Showing posts with label cooking. Show all posts

Thursday, January 30, 2014

Soy Yogurt at Home

Yes, it's been forever since I added to this little page of mine.  Life has been percolating along nicely.  I will say that since our little one has been free to eat soy and gluten, I've not felt the intense need to search out allergen-free options for him, so I've been absent from here for a little while.   

Of course, it's not true that he's allergen free.  He still can't have uncooked dairy, nor can he have any tree nuts.  But since we've long been comfortable with the lifestyle of rice or soymilk vs. milk and sunflower seed butter vs. tree nuts and peanuts, life feels essentially... normal.   

Then again, I now have a 4-year old vegetarian on my hands!  He's an "animal protector," in his words.  The only exception ~ and we saw him struggle with this decision for about a week ~ is that he still eats bacon.  "It's the only animal I still eat."  You GO little man!  He has embraced tofu, miso soup, and nearly the entire frozen vegetarian section of Trader Joe's.  After his early years of homemade-only eating, he's an adventurous eater and this cornucopia of packaged options is a little overwhelming for all of us... but a home cooked meal is still thankfully the norm.    

But with the humdrum of many days, we have been starting breakfast with a very expensive item that I wondered ~ would it be possible to make it at home?  The item:  Soy Yogurt.   

Delicious, creamy, sweet, full of protein.  What's not to love?  The price tag.  Each 6 oz container ranges from $ .99 to $1.09.  If given the opportunity, this child will eat several yogurts in one sitting ~ and that becomes mighty pricey.  

So I set out to try something new, and I'm back to tell you about it!  

Homemade soy yogurt is easy.  Heat up the milk, let it cool to the right temperature, add the yogurt starter, and keep it at a stable temperature for a while for the bacteria to culture.  Refrigerate, then eat.  Really, its that simple.   When I made the batch you see here, I didn't mind so much that our little guy at 3 cups of it in a row.  In fact, I was sitting next to him, grinning.


Homemade Soy Yogurt
The basic recipe:
  • 4 cups non-dairy milk.
    In this case I used soy, but you could use rice or coconut or almond...
  • 1/2 cup non-dairy yogurt as starter
    Ideally plain and unsweetened / no fruit
  • Optional: 1 packet of gelatin -or-
    agar-agar powder (to make vegan)
  1. Heat milk on medium heat stove to just under boiling, stirring occasionally.  I used a digital thermometer to track this.  If you decide to as well, make sure you're keeping the thermometer away from touching the pan.  Perching it on a wooden spoon did the trick for me.  
  2. While the milk is heating, wash the containers well. These came with the yogurt machine, but you could also use mason jars.  
  3. When the heat reaches nearly boiling (at least 180 but better around 190-200 F), turn off the stove. 
  4. Optional:  Add 1 package of gelatin or agar agar powder to make a firmer yogurt.  If you don't this will be pretty runny - but it will still be just as delicious
  5. Let the temp slowly cool to between 100-110 F.  (~ 42 C) Any hotter, and the good bacteria you're trying to cultivate will not grow! Alternatively, you could cool the milk in the fridge a little more quickly.  
  6. At 110 F, add the half cup of starter yogurt to the mixture and stir well.  Don't stir so much that there are resulting bubbles... just make sure it's evenly distributed. 
From here, you have a couple options:

Option 1:  If you have a yogurt maker: 

  • Pour the mixture into sterilized yogurt cups that came with the machine.  I use a mason jar filling funnel to make the process a little less messy.  
  • Turn on the machine and set the timer for around 8-10 hours.  You could also just let it sit overnight.
  • When your time is up, turn off the machine and open one of the containers.  It should smell and look like yogurt!  Put the containers in the fridge for at least 3 hours, where the yogurt will firm up a little more.   

    Option 2:  The Oven Method
    • Heat your oven to the lowest temp you can (My oven is 140) and then turn it off.   Turn on the light inside the oven - it'll keep the interior warm all night. 
      1. Pour into sterilized mason jars and cover. (Hey, we're not canning here... just cover with screw-on lids and or rings/tops, but no need to process in a hot water bath!)  
      2. Line a large earthenware crock or dutch oven with a tea towel.  Place your mason jars inside. Cover with another tea towel, and then cover the crock with its own cover. 
      3. Put the crock inside the turned-off oven and close the door.  
      4. Leave overnight.  
      5. In the morning, open one of the containers.  It should smell and look like yogurt!  Put the mason jars in the fridge for at least 3 hours, where the yogurt will firm up a little more.   
      Yum!
      • Enjoy!  Add whatever flavors you enjoy:  honey, jam, fruit are all great options.    Not only is the yogurt delicious and allergen-friendly, but the cost difference is astounding!

      Here's a comparison:

      Comparison         O'Soy       Soy Milk             Milk      Organic Milk
      oz               6               32               64                      64
      cost  $           1.09  $           2.99  $           3.89  $                  5.99
      cost per ounce  $           0.18  $           0.09  $           0.06  $                  0.09


      Some useful references I've found about general yogurt making, dairy and non-dairy:
      - Granny Miller - Crock Pot Yogurt (dairy) 
      - Stephanie O'Dea's Crock Pot Yogurt (dairy)
      - There are some GREAT ideas at Waking Up Vegan about alternate milks, thickeners and flavorings! (non-dairy)


      Wednesday, January 11, 2012

      Cooking. Slow.

      
      Turkey Coconut Rice with Chickpeas and Raisins
       There's something so comforting about a rice dish. It's warm and filling, just right for a nippy day. You feel like putting it into a bowl, not on a plate. Use a spoon instead of a fork. Everything round and delicious and... like home.

      Problem is: it can take a while to make the rice. I mean, not forever... but there needs to be a little forethought and planning involved than usually takes place in this busy house. Small hungry child running around the kitchen? Let's chop something up right now! Hence not as much rice around here as I'd like. Or slow cooked stew. Or baked things.

      But maybe the New Year is a good time to remember that slowing down is a good thing. That making food in a panicked state means making panicked food. And while I do intend to translate this into using my slow cooker, I may need to work my way up to that kind of planning. (i.e. thinking about dinner during breakfast)

      Last night, instead, I made rice.

      What's great about most starches like rice or pasta or potatoes or quinoa or polenta or ... well, I could go on here ... is that while they have their own inherent qualities, they're usually used as a canvas for other flavors.  And what a canvas rice is!   It's all about texture and flavor with rice.  Is it fluffy and light?  Dense and glutinous?  slightly cracked, crispy and sweet?  hefty rich brown?   Each of these has complete categories of cuisine dedicated to them: from pilafs and biryanis to sticky rice desserts, to stir fried vegetables over cracked white rice, to jambalayas and even stuffing.   The possibilities are endless. 

      But last night, I wasn't thinking about that cornucopia of flavor; there was no time.  I was in dinner panic mode.  I had only a few things around the kitchen... a pound of ground turkey and... well, that was the furthest I'd thought.  Q was running around the house being his adorable self, and I was torn between being with him or making food for us. 

      He hadn't been eating well all day and had to be hungry but he wasn't falling for any of my cheap tricks: Chex "crackers" in a bowl, craisins, even blueberries weren't enticing him.  And he has suddenly decided to give up his previously favorite thing in the world, hot dogs.  (His new favorite thing in the world is bacon.  So much so that he has decided there is a "bacon tube" in his bedroom that he pretends dispenses bacon at his whim.  He is a gracious sharer of this imaginary bacon, I am proud to say ~ but hey, it's pretend bacon!)  

      So in the service of nutrition, I quickly sauteed up some onions and ground turkey.  I wanted to try something a little different... so I threw in some cumin, cloves, cinnamon, smoked paprika, and chicken broth powder.   Then for some "finger food" additions, I put in a can of chickpeas and a handful of raisins.   By then I felt like I was channeling the Near East ~ but it needed something a little richer in there, so I threw in a whole can of coconut milk.   ... and, gasp!  wayyyyyy to much liquid!  what to do? 

      There was easily an extra cup of liquid that needed to be disposed of, but I wasn't going to throw away those lovely spices just to get rid of it.   What could soak it all up and still make the dish better?   Noodles?  Nah.  Potatoes?  don't have any. 

      Then it hit me.  Rice.  

      I threw in about a cup and a half of jasmine rice and stirred it down.  Clearly it needed a bit more liquid to get the 2:1 ratio right so I added about 2/3 cup more water.  I let it boil, then stirred, covered and turned it down to a simmer... and walked away to play with my son.   Ahh.   

      It ended up rich without tasting at all like coconut, dense and warm with just the right mix of meat, chickpeas and raisins, and overall... delicious! 

      So here's the actual recipe which makes it look like I planned all this.  But this was a happy accident. 

      Turkey Coconut Rice with Chickpeas and Raisins

      2 T oil for frying (non allergenic ... I use olive or canola)
      1 cup chopped onions (I use the equivalent frozen because it's faster and they're pre-chopped!)
      1 T sodium-free chicken broth powder (I use Herb-ox)
      1 tsp ground cumin
      1 tsp smoked paprika
      1/2 tsp ground cloves
      1/2 tsp cinnamon
      dash cardamom (optional)
      1 lb ground turkey
      1  15 oz can of chick peas, drained
      1 cup raisins
      1  15 oz can of coconut milk (not the stuff you drink by the way... just good old coconut milk)
      1 1/3 cups jasmine or other white rice
      2/3 cup water

      1. In a deep frying pan or wide stock pan, sautee onions in a couple T of oil until transparent, stirring occasionally.
      2. Add the spices to the onions and continue to sautee for a couple minutes, until onions are no longer releasing liquid
      3. Add ground turkey, break apart and brown.
      4. Add can of chickpeas and the raisins, stirring all together for about 2 - 3 minutes
      5. Add can of coconut milk and stir.  Heat the liquid until boiling slightly
      6. Add the rice and water.  Stir until all grains are covered by the liquid. 
      7. Let the mixture reach another boil.  Cover, turn down the heat to simmer / low for around 20 minutes.  Check around 15 minutes in to ensure the rice has enough water and if it's necessary, add 1/4 cup more water. 
      8. Turn off heat and keep covered for a few extra minutes to ensure rice is fully cooked.  Fluff and serve!


      Posted by Picasa

      Friday, October 28, 2011

      Of cooking, cheese and good morning omlettes

      Am I obsessed with breakfast food? Maybe.

      But... there might be a good reason.  Morning is the one part of the day I tend to have wide open stretches of time with my son. Cooking together has become a time for us to just be with each other ~ laughing, making something, and exploring new ways to communicate. It's our special time.
      
      My little sous chef, with his own pots and pans. 
      Canape "baby knife", spice cabinet, and favorite spices.
      
      He's starting to talk a lot more, and it's so exciting. And even though I know it's happening, I am always surprised when ~ out of nowhere ~ he says words and phrases I didn't realize he had even heard before. Watching his mind and imagination blossom has been one of the single most amazing things I've ever experienced. I'm sure, if you're a parent, you've had this experience... you hear the words "apple cider" pop out of the mouth that used to solely utter "ba ba ba ba" ~ and you just want to jump for joy. Or cry. Or hug him. Or all of these things. But instead, so the kid doesn't think you're a complete loon, you say "oh, yes! I see the apple cider too! Would you like some?" and nod sagely.

      While cooking with Q, I'm having more and more of these moments. He is showing so much personality, and I'm getting to know more of what he likes and doesn't ~ for example, he loves basil in his eggs and cardamom in his oatmeal.  I see how much of what he gets ~ like, he knows mommy loves smoked paprika, so he hands it to me whenever he finds it in the spice drawer. (we have a spice drawer that rolls out of the bottom cabinets, only 4 inches wide but cabinet depth... it's the perfect height for a toddler to pull out and, well, re-organize!) And I get to hear his new language skills as he describes what he is doing.  "I stirring, cover, bubble bubble!" he says to me as he does all those things.

      We got him his own little pot and pan set (thank you Ikea kid's section!) and he's in love.  You see him using it in the picture above: I pull up a kitchen chair with its back toward the stove, remove the stove dials he can reach, keep him faaaar enough away from the hot spots, and let him pretend to cook alongside me.  He has to have a spatula all his own, a mini "cutting" board, and a few play veggies (or real ones) so he can make his own thing.  We let him "try" ingredients to see if he wants to include them in his masterpiece ~ if he likes them, they go in the pot!  Just the other day we ended up with a piece of broccoli, a tiny bit of mushroom, a couple peas, black pepper and some tarragon.    A lovely dish!

      So... back to breakfast. 

      We've been making eggs for Q for a long time.  Sometimes we mix it up a bit and fry a couple chopped hot dogs in there, or bacon.  (We have found both in nitrate-free, uncured versions ~ Oscar Mayer all-beef Angus Selects for the hot dogs, and Nature's Promise uncured bacon (from Stop & Shop)... plus other deli meats that are uncured and gluten free, like Hormel Natural Choice oven roasted turkey, shown below)   We can add variety by frying up a little of one of those first, then adding eggs and scrambling them.  Delicious!

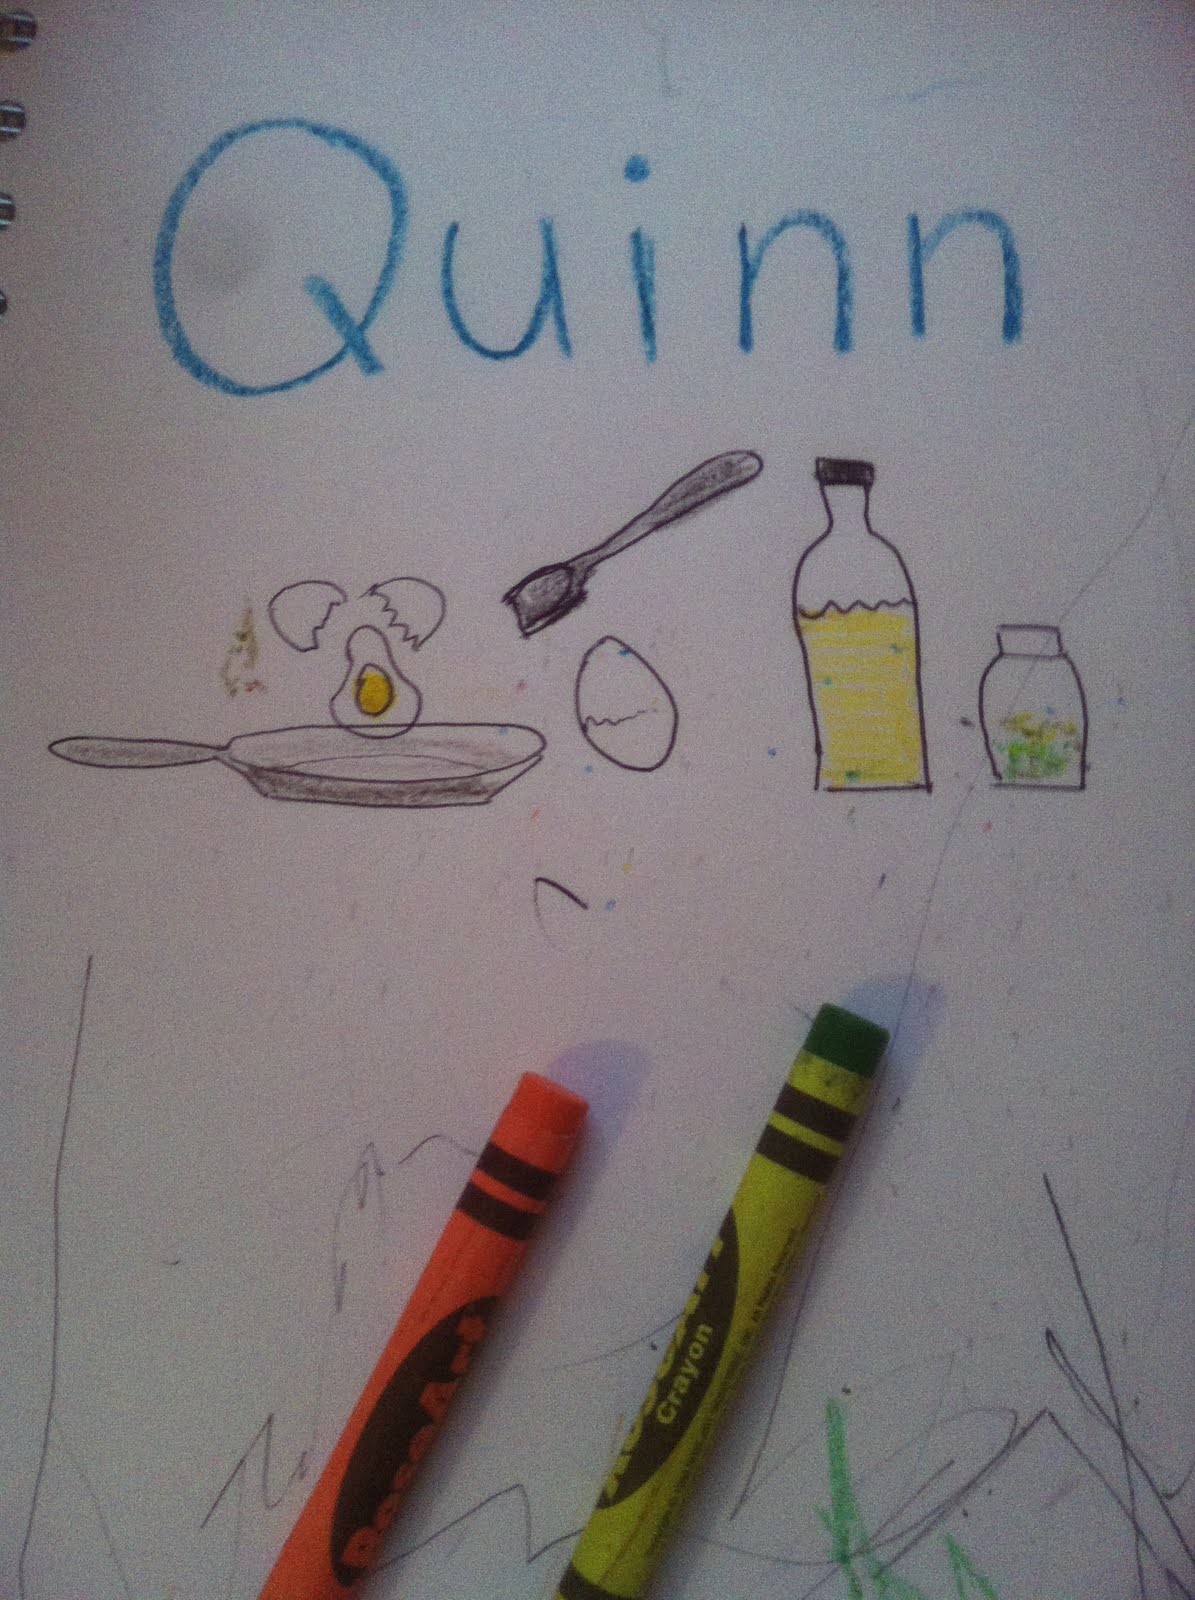
      Working on communication, I asked Q the other day what we needed to make "eggies" as he calls them.  During the conversation, we drew the items either he or I came up with, and it became kind of a visual recipe.

      We needed: a pan, eggs, a spatula, oil, and of course basil. 

      And while that's been fun for a while, I began to wonder how to mix it up.  At the same time, I heard about rice-milk based cheese!  Oh cheese, the holy grail of missing foods for me when I was nursing!  I missed it, craved it ~ but non-dairy versions I found either were soy-based or even had casein in them.  It was so frustrating!  


      Just recently, however, I heard about rice-milk based cheese ~ it was hard to hunt down, but I found one at our local natural foods market that was soy, dairy, gluten and nut free ~ Daiya Dairy Free.  (For those in the New Haven area:  Edge of the Woods)  There were other dizzying options for those who don't have the same limitations:  almond milk cheese looked interesting, lots of soy, but... well, if you're reading this blog you're likely already a label-reading person.  There's a lot of hidden casein and soy in many.  

      Even so, it was so exciting to stand at the cheese section and imagine the possibilities for my little guy... grilled cheese sandwiches, nachos, pizza!  Many of the foods that the grand poobah in the sky created specifically to delight children. 

      I picked up two varieties: cheddar and mozzarella styles.  As soon as I was home, I had to try them!  Right out of the package, they seemed a little ... eh.  A bit salty, not so much creamy.  But, apply heat e voila!  Melty, gooey, and pretty darned good for something that isn't the real thing.  Yay!

      So again, back to breakfast: 

      Combining my recent discovery of the rice-milk based cheese and my desire to branch out in the eggs department, it was a natural progression to omlettes.  Simple, easy, fast, and way better than just scrambled.  Here's what we used:

      Turkey-Broccoli-Cheese Omlettes

      Olive oil
      1/4 medium onion, diced fine
      1 broccoli "tree" chopped fine
      1 slice deli turkey, diced small  ~ or hot dogs, leftover chicken, etc.
      2 Eggs
      1/4 cup cheddar-style rice milk cheese
      ground black pepper, just a shake 
      basil or Italian spices, to taste

      In a little oil, saute onion and broccoli together until the onion is translucent and the broccoli is bright green, just a minute or two.  Add the broccoli and saute a couple minutes. 

      Meanwhile crack the eggs into a little bowl and scramble them.  Add to the pan in as close to a circle as you can manage.  Lower the heat to medium low, and cover for a couple minutes until the egg is starting to set. 

      Add the cheese and spices and cover again until the egg is set and the cheese looks melty. 
      Fold over the omlette, but if that doesn't work, just serve this as scrambled eggs and no one will know the difference!

      Get the plate on the table to cool off while you wrangle your small child into the high chair, booster seat or if necessary, your lap.  This should be the precise time needed to cool off the omlette to the perfect temperature! 

      This was such a win with Q! ... he gobbled it up, practicing "cutting" skills with his little plastic fork, but eventually just started grabbing chunks of egg and turkey omlette.  Dipping daintily into ketchup first, then unceremoniously shoving the food into his mouth, he loved it.  And I felt so close to him, as I did just about the same.

      Posted by Picasa