Thursday, December 8, 2011

Whole lotta LATKES!

I have a little dreidel
I made it out of clay
And when it's dry and ready
Then dreidel I shall play!

OK, we're gearing up for the holidays! Both Christmas and Hanukkah are right around the corner. What could be better than to try out our favorite yummy stuff?

Well, to tell you the truth, I have to admit that trying this recipe, although I have been thinking about it for a while, was a born out of necessity. As you may already have read in other portions of this blog, I have a great love of frozen fruit and vegetables. Why? Well, because they are the next best thing to fresh, they're right there when you need them, they're usually pre-chopped, and you can portion them out as your heart tells you. Little one wants peaches in the middle of winter? Grab the resealable bag from the freezer, defrost a handful, and instant happy (and fed) child. No need to whip out the can opener or open one of the travel containers of fruit you should be saving for the road. Same with a handful of peas or green beans to add color and vitamins to the overall meal.
But, silly me, I forgot to put away the bag of frozen chopped onions last night.  Not only did they melt and make a sticky mess on the counter, but I feared they'd been rendered useless.  Luckily, they were still usable... but needed to be, stat!  Mind clicking into gear: onions.  breakfast. ... must involve potatoes.  what about hash browns?  nah... what about ~ potato pancakes?  e voila:  LATKES!
I've had so many lovely, light as air, non-soggy latkes in my day, but I've always had horrible luck.  Mine turn out soggy: potato juice everywhere while cooking, and thick as mud while eating.  Luckily, I've been reading up on them in prep for the holiday season. 
What's the key? The secret? 

Squeeze all the extra juice out of the potatoes and onions after you shred them.  Seriously, it's that simple!  It makes for some mighty crispy, tasty latkes.

Potato Latkes

2 medium sized potatoes
1 medium onion
1 egg
2 T gluten free flour
1 t baking powder
Oil for frying


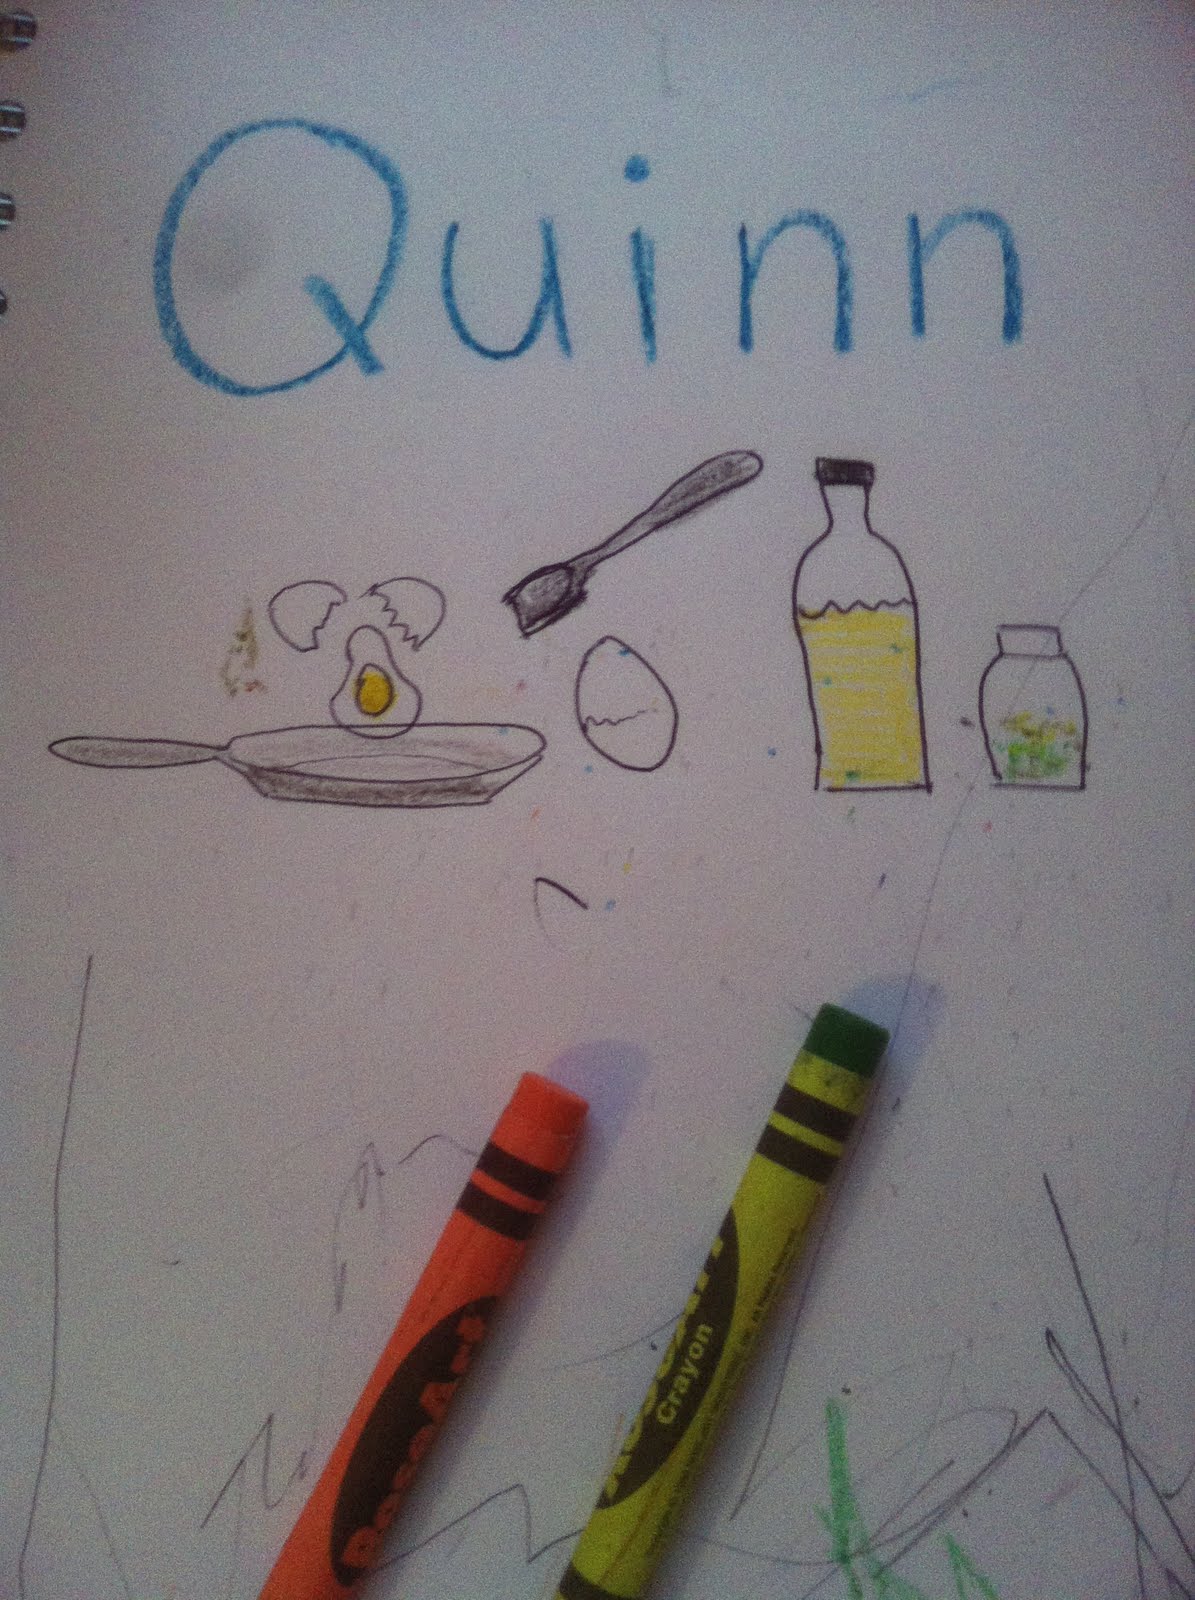
1. Shred the potatoes and onions, then lay them flat on either a clean tea towel or a paper towel.  Roll them up jelly-roll style, and over a bowl, squeeze them to your heart's content.
2. Scramble the egg, add the flour and baking powder, and stir. 
3. Add the potatoes and onions into the egg/flour mixture and stir. 
4. Fry them up!   Drain on paper towels

Rousing choruses of Dreidel dreidel are recommended but not necessary. 


Tuesday, December 6, 2011

POP: Plain old Popcorn!


From left: popped popcorn, unpopped popcorn,
 nesting doll measuring cups.
 
Got a brown lunch bag?
Got a microwave?
Got some popcorn?

Yes? Then you're all set!

My son loves popcorn. When we went to the local farm market's Fall Pumpkin Extravaganza, they had maple kettle corn that was made with corn oil, maple syrup, and a touch of salt. It was one of only prepared things I have EVER bought for him, because I could see the guy making it. It was a massive vat of popcorn into which he poired the syrup, and then stirred up with a paddle the size of an oar. There was little opportunity for him to sneak in something nefarious. So... I gritted my teeth, bought it, and thank goodness! It was not only delicious, but there was no reaction. Most of all, I scored MASSIVE "yay Mommy" points.

Yeah, I had to do a little quality control (i.e. ongoing tasting and testing... and oh that was rough) to bite off the occasional seed or husk from the popcorn, but that was me just being mommy crazy. But since then, he has asked for popcorn often enough for me to wonder how I could make my own.

While I haven't gotten to the Maple Syrup Kettle Corn phase yet, I am aware that there is no way in heck we could use regular Microwave Popcorn. No question there's Soy in them, plus likely butter or casein, or some bizarre chemicals. Plus... you can't recycle the bags and it's a big nasty mess if you over-nuke them.

So, when I saw the post from Squawkfox on how to make our own microwave popcorn from only a bag and some corn, I was intrigued. It seemed too easy. But having tried it, it's not only easy but delicious!

Lil One ate a bowl of it all by himself and asked for more. I was amazed at how he could manage 3-4 pieces at a time in his little mouth. But I loved it anyway, and kept the sippy handy. Just in case. :)
_______________________________________________

Here's the recipe: (clipped from post linked to from above)

Step One: Get a brown paper bag
This is ridiculously easy, internet people. Just head on over to your local grocery store and pickup a package of no name flat-bottomed brown paper lunch bags.
Step Two: Bag your popcorn
Add a 1/2 cup scoop of bulk popcorn kernels to your brown paper bag.
Fold the bag over twice. Don’t use staples to secure the bag — this might spark in your microwave.
Step Three: Pop in microwave
Stick the popcorn bag into your microwave. I set mine for 3 minutes on high.
(Sue's note: I had a smaller bag and only used a 1/4 cup of popcorn, so I did it with 2 minutes...
and was juuuuust starting to get some burned kernels which were easy to dispose of)
Step Four: Toppings. Salt, Sugar, Pepper, Garlic Powder, etc. Whatever you like and you can have!
_______________________________________________

Seriously, that's all there is to it.
Plain ol' popcorn... saves money, calories, and no allergens except corn ~ (but then you knew that!)
What's not to love?

Thursday, December 1, 2011

Pumpkin and Spice (r)Ice Cream!


Pumpkin Ice Cream with Gingersnaps

OK rice milk is in it too, but in fact the star of this pumpkin "ice cream" is really coconut milk. Rich, delicious coconut milk.
And this is SO simple to make!

All it takes is coconut milk, pumpkin you probably have left over from Thanksgiving, pumpkin pie spices, sweetener, rice milk. Stir it up, pour into the ice cream maker, and in a half hour you have some sweeeeet eats!

I'm finding that vegan cooking sites are a treasure trove of ideas.  Take this one from the lovely blog So Good and Tasty, written by Jaqui (who also has a great Etsy shop, check it out!)

It's a deviously simple pumpkin pie flavored ice cream made with just a few ingredients that you can whip up in five minutes and freeze up in thirty.   Once you're done, you will have not only the admiration of your children but also anyone else who has the good fortune to be eating with you that day!

Now, don't get nervous about it tasting coconut-y.  It doesn't.  The coconut adds just the right amount of richness to the ice cream ~ and unless someone told you that it had coconut in it, you'd never know it was there.  It's smooth, creamy, sweet, spicy.  Delicious!

So below, I am quoting Jacqui's recipe directly, but when I made it, there were a few changes.  Instead of almond, I used rice milk in the same amount, and since I didn't have any cloves on hand I used some ginger and allspice in overall the same measures. 

The first time I made it, I used Lyle's Golden Syrup instead of the cane sugar.  I did this mainly because I didn't want to wait an hour for the mix to cool in the fridge. (I guessed that was to allow the granulated sugar to dissolve.)  So, I used the only pre-dissoved sugar I had on hand, and Lyle's was it!  It ended up not sweet enough.  The second time, I used Karo (corn) syrup and it still wasn't sweet enough ~ until I added a 1/4 c more of maple syrup!  Perfect.  So if you go that route, it's 3/4 c Karo or Lyle's, plus 1/4 cup maple syrup. 

Vegan Pumpkin Spice Ice Cream
1 14 ounce can coconut milk
3/4 cup almond milk, or other dairy free milk
1 teaspoon cinnamon
1/2 teaspoon nutmeg
1/4 teaspoon cloves
3/4 cup cane sugar
1 cup pumpkin puree

In a large bowl combine all the ingredients and whisk together well. Let chill for about an hour in your fridge. Once really cold, follow instructions for your ice cream maker. 

Ready to come out!
My ice cream maker suggests around 30 minutes of stirring in the machine.  It goes in looking like thin pudding, and comes out like... well, Ice Cream!   You can eat it then, but it'll be pretty soft.  Most ice cream makers will suggest you "cure" the result in the freezer for at least a half hour afterward.   But seriously, who has time for that?!


We finished about half of the container that night.  It was perfect with (allergen free Pamela's) ginger snaps.  Can you imagine this over apple pie?  All I can say is, WOW!
Posted by Picasa

Tuesday, November 29, 2011

Dare we Dairy?

It's been a long time coming, but it's possible we're coming close to knocking an allergen off the list.  Knock wood, pardon the pun. 

We did a new RAST test recently... the first one since the flurry of testing we did upon realizing little one was having issues.  He's just about to hit the 2 year mark, and testing is getting closer to being more valid, more accurate. 

This one came back with some interesting results that I barely dare to believe.  One in particular shocked me:  he's a scale of 1 out of 5 for dairy!  That's the same value he received for eggs... and G*d bless him, he eats eggs nearly every day with no issue. 

So. 

We are starting to give him some easy to digest dairy in the form of yogurt.  Sunday.  Just a little baby spoon each day.  Non-flavored, high fat Greek style yogurt.  And he (drum roll...)

- Has not broken out
- Has not exhibited any itching
- Has not had diarrhea or constipation
- Has no bubbles, spots, or hives on his face, backside, or elsewhere. 

... this is day 3! 

It's incredible to think that we might be able to add other dairy like milk or cheese to the mix.  I mean, I've gotten used to keeping our son in a silo of known foods, a list so clearly defined by painstaking label reading and research.  I'm almost agoraphobic about it.  Almost.  The rest of me is beside myself bated breath thrilled about this prospects.  But it is scary.  It has come to be that I sometimes measure my worth as a mother through ensuring he is well fed and free of allergens. 

If it's true, it takes one level of complexity away from our lives.  But then again, add another... We have to memorize the package contents again, but maybe a REAL grilled cheese might be worth all that.  Maybe butter in mashed potatoes.  Maybe a tall glass of chocolate milk. 

Fingers crossed.  Anyone out there have some tips?  Anyone out there transitioning to a wider diet based on RAST testing a child?

Monday, November 21, 2011

Simple as Blueberry Pie

One of the simplest pleasures in life is pie.

Not 3.14... though it's fun to imagine the connections between a pie's round shape and that famous infinite number. If we had, in fact, infinite amounts of pie, I think I'd be pretty happy. Dividing it in eighths is fun, but then again there are those people who are just tasters, who insist in "half a slice" (which creates challenges when you have a soupy fruit center), and those midnight pie eaters who attempt to evade detection with their tiny sliver slices. Oh yeah, you know who you are.  And we're watching you. 

So inevitably as the cold weather comes upon me, I want to bake.  Thanksgiving's coming, too... but I feel the need to have something bright and surprising after a lot of Halloween pumpkin related food.  I mean, we're going to have a lot of cold weather related food coming up soon, so why not have a quick taste of summer just before we go full boar into the Holidays? 

OK, that and I accidentally left out some frozen blueberries and they needed to be used asap. 

So, while I'll be making pumpkin pie later this week, I give you... Blueberry Pie!

I have a ridiculously simple "regular" gluten-filled pastry dough recipe that I've adapted for this recipe.  I literally keep it in my recipe box on a Post it.  Here it is in its original form:   


All you have to do to update this is use Gluten Free All Purpose Flour (I use Bob's Red Mill), and palm shortening (I use Spectrum Organics).  Seriously that's all there is to it ~ just put it in a plastic bag in the fridge for a few minutes, then roll it out.  This makes enough for one crust.  If you intend to put on a top crust, just double it. 

For those of you who cannot read my chicken scrawl, here you go:

Food Processor Pastry
1c. Flour
1/4 t. salt
1/4 cup shortening
1/4 cup cold water

Put flour and salt into the food processor.  Pulse 3 - 4 times.
Add shortening. Pulse 5 - 6 times.  Dough should look like coarse meal.
Then with machine running, add water 1 Tablespoon at a time until it suddenly WHOOSHes into a ball of dough.   Put in a plastic baggie (or something that will avoid its outsides from starting to dry out) in the fridge to cool for a few minutes. 

For a pre-baked crust:  Roll it out, prick sides and bottom with a fork here and there, and bake at 425 for 10 - 12 minutes.  Cool then add things like chocolate pudding etc.

For a non-pre-baked crust:  Roll it out, prick sides and bottom with a fork here and there, and then add your fruit mixture, pumpkin pie filling, etc. 

_____________________________________________

Blueberry Pie

Jessica and I made a blueberry pie last week.  She was very excited about making a pie for little one, and we had these frozen blueberries hanging around doing nothing... why not?   When I came down for lunch there was pastry rolled up into balls and waiting to be made into crusts, and a big bowl of defrosted blueberries.   How do we make that into pie?

Well, my mom always just told me to cover fruit with a few tablespoons granulated sugar, a couple tablespoons of flour, and let it sit awhile.  Vague but serviceable.  The New York Times Cookbook told us a little more.   They suggested that for 3 cups blueberries, we add 9 tsp of corn starch and 1/2 cup sugar!  Plus a little lemon juice.  Stir it up and you're all set.  More gluten free... yay.  If you have a corn allergy you can also use tapioca starch instead of corn starch.

Once the filling is ready, pour into your pie shell , cover with a top crust if you like.  I didn't have quite enough pastry for a 2 sided crust so I rolled it out and sliced it into strips to make a lattice work.  Looks pretty and covers up a multitude of sins like... well, not having enough pastry! 

Bake at 400 degrees for around 40 minutes or until the pastry becomes golden.  And there you have yourself a pie! 

_____________________________________________
Posted by Picasa

Friday, November 11, 2011

Smoooooooooth-ies

Your challenge should you choose to accept it.

- Get more fruit into your child
- Encourage child to drink more liquids
- Make child super happy

.... and I give you: Smoothies!

Frozen fruit is so useful. If kept in its frosty home, it generally doesn't go bad any time soon. You can just take out what you need for any specific situation, say, add a few blueberries to pancakes or defrost some peaches for finger food. It's available all year, is pre-cut into generally bite sized, peaches, and if you're really stuck for a quick brunch potluck idea, just throw a few types into a bowl before you walk out the door and it's usually pretty close to defrosted by the time you reach our destination.


But for pure toddler entertainment, a smoothie can't be beat. It's better nutrition for the kid than a milkshake, but just as delicious. And it takes less than five minutes to make if you have a few basic ingredients handy.

- Allergen free milk
   (I use Vanilla Rice Milk)
- Coconut-Milk based ice cream
- Frozen fruit of your choice

For a few sippys full, I throw in about 1.5 cups of frozen fruit, 1 cup rice milk, and about 1/2 cup of coconut milk ice cream.  

Put your kid up on the counter, keep one arm around him, another on the blender, and let him push the button.  Yell and run in place (ensuring complete hysterical laughter from child) while watching how smooth it's getting.  Once the laughter has reached a fever pitch and the smoothie is smooth, make a huge deal about pressing "stop!"  Pour into glasses or sippy and enjoy.  If you need to thin it a little (it does have all that fruit pulp after all), just add a little more milk or some water.  Put the rest in the fridge for the rest of your family to discover. 


Tuesday, November 8, 2011

Musings on a Pumpkin Bread epic fail

Things I learned this morning:

Who knew bread could fall like a souffle?
1. Even if you have an extra hour to kill, do not assume a quick bread recipe will be quick.
2. Tack on an extra half hour (at least) when baking in the presence of a toddler.
3. Never, ever, make any creative guesses about liquid qty when baking.
4. This is doubly so when gluten free baking.
5. Even if it's a glutinous mass instead of bread, anything made with pumpkin is still yummy.

Monday, November 7, 2011

Potential food allergens in preschool and school activities

So we're looking into pre-schools. I can't believe this is happening already!

Our son's on the cusp between school year ages... he's a December baby, so if he goes into school next September, he'll still be a two year old, going on three. Should we wait a year? Not? Will he be the littlest one, or the older kid in class?  Considering the difference we've seen in the past year, and the fact it's accelerating, how can we estimate where he'll be in a year?  So many decisions. 

Not least of all, though, is how we will address his allergies.  One of the pre-schools we visited, while wonderful in so many ways, had a snack zone wide open for the children.  What a great thought normally... let children self-select snacks and the times when they're hungry.  But when I looked at that area, they included crackers and other foods I know to be harmful for our son.  And when I asked the director about their allergy policy, it was met with a thoughtful "well, when we've had peanut allergic children, we just make sure the kids didn't bring them to share." 

I asked whether the staff had any experience with other allergies, they admitted they didn't but were willing to work with us.  While we appreciated that, it made me worry... if they haven't addressed this issue in the past, they don't know the breadth of what they're dealing with here. 

So many nuances to consider... and would all the other children understand why they can't have cheese sticks? crackers? pretzels? tuna? chocolate chip cookies?  We can keep him healthy at home, but what will we do when kids start sharing things with him?  And what if he has free access to food that he is too young to understand he can't have?

Around the time we were having these conversations, I came across this interesting article on the Food Allergy Education Network's facebook feed.   And it became clear to me there's a lot more we have to consider beyond just food when it comes to his pre-school.  This is a list I will be sure to share with any place our son goes! 

Sigh - maybe we need an additional year's preparation just to get ready for pre-school!
But forewarned is forearmed, and I'm so glad to have this information.


Note!  This is a cut-and-paste from Kids with Food Allergies (http://www.kidswithfoodallergies.org/) ... a wonderful site with great information for all families, educators, or child care providers who need information about living with food allergies.  I've attributed below as their site does as well.  My hope is that others can benefit from their efforts as I have.   
Read on..... 
_______________________________________________________________

Potential food allergens in preschool and school activities

Unexpected sources of allergens in school
Food used in lesson plans may need to be substituted depending on student food allergies


According to the American Academy of Allergy, Asthma and Immunology, "food used in lesson plans for math or science, crafts, and cooking classes may need to be substituted depending on the allergies of the students". 1

Below is a list of some unexpected places you can encounter common food allergens, along with alternatives and precautions that can be used. Please note that this is not an exhaustive list; it is a general guide only and is not inclusive of every potential food allergen. Please verify all ingredients yourself by contacting the manufacturers as ingredients may change.


Activity/Materials Allergen(s) Potentially Safe Alternatives and

Appropriate Precautions
Play-Doh® (commercial or wheat-based homemade)Wheat Crayola® Model Magic®

Modeling clay (NOT modeling dough)


Moon Sand

Wheat-free, gluten-free dough from http://www.lakeshorelearning.com/

Homemade rice- or buckwheat-based play dough

Other sensory materials such as goop, slime, and ooblick

Use a safe homemade playdough or ooblick:

- Rice playdough (free recipe)

- Cornstarch playdough (requires membership)

- Edible playdough (requires membership)

- Ooblick recipe: 1 1/2 cups corn starch, 1 cup water, food color (optional). Mix the ingredients together; as children play with the mixture it will be solid when they squeeze it and liquid when they release it.
Macaroni art (wheat) Wheat, egg Rice macaroni

Quinoa macaroni
Counting/sorting beans, grains, pasta, M&Ms® or other small foods Potentially all Counting/sorting foam, wood or plastic beads, or other small non-food items. Read ingredient labels to choose food items with safe ingredients.
Sensory tables that use grains, pasta, candies or other small foods Potentially all Use non-food items or read ingredients to choose food items with safe ingredients
Tempera paint (homemade and some very high-end commercial) Egg Commercial finger paint Crayola® Kids Paint

Most commercial paints suitable for children
Finger paint Pudding finger paint may contain milk. Laundry soap or laundry starch mixed in with finger paints to make them thicker. Laundry starch may contain corn, laundry soap may contain allergens. Read ingredients to find milk-free finger paints. Laundry starch or soap can be omitted if avoiding corn. Read ingredients to find a safe laundry soap.
Crayons May contain soy Read ingredients to find soy-free crayons
Crayola® Wonder Soy Use a non-soy based ink
Craft paste May contain wheat starch Elmer's® Glue sticks

Read labels to determine if wheat starch is present.
Shaving cream May contain milk Read ingredients to find a milk free shaving cream
Ooblick, oobleck, goop, slime May contain corn Create mixture using tapioca starch instead of corn starch, or read ingredients to find a safe version
Bird feeders Peanut butter

Wheat in birdseed mix

Nut oils in seed mix
Consider making a hummingbird or butterfly feeder instead, using sugar, water and food coloring.


Use soy nut butter or sunflower butter

Regular Crisco ® (contains soy oil) or other safe hard shortening

Honey

Seeds or seed mix without wheat seeds or nut oils
Planting seeds Legume seeds (such as beans, peas or peanut)

Corn kernels

Egg shells or egg containers that are sometimes used as "pots" to germinate seeds
Any other seeds

Use other safe pots to grow seeds
Baking projects Potentially all You can share lots of safe recipes and request to participate in any baking activities.
Paper mache (Papier-mâché) Wheat Elmer's ® glue solution

Buckwheat flour solution
Birthday and holiday celebrations Potentially all Non-food celebration (songs, goodie bags, stickers)

You can provide safe cake or cupcakes for the class.
Making butter Dairy None
Making maracas or shakers Some legumes Fill maracas or shakers with rice, popcorn, or sand.
Projects using empty egg cartons, milk cartons, yogurt containers, etc. Egg

Dairy
You can provide safe empty containers for the class.

One place to purchase new egg cartons is http://www.eggcartons.com/
Hand-washing (teachers and children) Soaps, liquid soaps, hand wipes, diaper wipes and hand lotion may contain many allergens including wheat, dairy, soy and/or nut extracts including shea nut.

Cloth towels may contain food residue.
Read soap, liquid soap, wipe and lotion labels to determine if allergens are present and choose a safe brand.

Use paper towels to dry hands.

Use safe wipes to clean hands.
Musical instruments Allergens will be present on mouth-blown musical instruments. Remove mouth-blown musical instruments from classroom.

Provide a designated set of mouth-blown instruments for your child's use only.
Play kitchen Empty "real" egg cartons, cereal boxes, etc. will contain allergens. If used, you can provide safe "real" containers to replace allergenic ones.


References:

1. American Academy of Allergy, Asthma and Immunology (1998). Anaphylaxis in schools and other child-care settings . Accessed August 2007, http://www.aaaai.org/media/resources/academy_statements/position_statements/ps34.asp

Download a copy of this article here:
Potential food allergens in preschool and school activities

Thanks to KFA member Lara A. for providing her assistance in developing this document.

Originally published August 2007. Updated August 2008.


Friday, November 4, 2011

Cheese, glorious (rice) cheese!

You might say... "Seriously, just plain old grilled cheese?"

And I would say... "is there such a thing?"

Because grilled cheese is one of those things that makes childhood complete. Like splashing in puddles, or throwing balls in the house, or learning to ride a tricycle. It's just plain, well, grilled cheese!

It's easy, it's comfort food, and it's a celebration of warmth and happiness ~ all in one simple bite.

Looking for ways to include classic kids' edibles that are normally verboten due to food allergies is a hobby for me. If I'm able to find a soy and nut free peanut butter alternative (I'm thinking sunflower seed butter is a likely option), I will be making SB&J soon. In the meantime, I'm making grilled cheese sandwiches in all their glory.

Since I've found rice based cheese shreds (from Daiya dairy free), Q has been on a mommy-enabled cheese binge. Omlettes. Nachos. Now sandwiches.

The rice cheeses are OK uncooked, but a little salty and chalky, so I wouldn't use them in salads of anything. But when melted, they're fantastic! I've used their mozzarella style and cheddar style cheeses, but they also carry a pepper jack variety which looks promising for tacos. (aha! my next project has been decided...)

So, does one really need a recipe for grilled cheese?  Oil the pan (olive oil here), lay down the allergen-free bread (Udi's white sandwich here), put the cheese on, close the sandwich, and press down with a spatula to ensure the cheese melts into the bread. Get it nice and grill-y brown, and ensure there's melty-ness going on in there.  Serve by slicing it in half. (your choice as to straight or diagonal... I don't want to affect your camp on this, you hear me?)

Additions are all upside:  I like to add a slice of deli turkey to this, but you could add any veggies you'd like to hide inside: thin-sliced tomato (potential allergen there of course), avocado, and pickles are all delicious!

And best of all, stuff for dipping:  ketchup (if you have a corn allergy to work with, I hear Hunt's does not use HFCS), even allergen-free mayonnaise (most commercial mayo is soybean oil based, so I stock up during Passover for canola-oil based varieties or buy Spectrum Organics canola-based mayo)

Oh, the possibilities! 
Grilled cheese is kind of like the game of Othello: a moment to learn, a lifetime to master. 


It's the simple pleasures. Really.

Tuesday, November 1, 2011

Fall to Winter...

In honor of the big Connecticut Snowstorm, I've updated my background from a Fall to a Winter theme. 

If we get Fall back, I'll go back!

Luckily we never lost power as a lot of our friends and neighbors did. 

Let's leave the light on for them...

Halloween, Scary.

It finally happened.  I knew this day would come, and I've been worrying about it. 

Now that he's a toddler, and is more than a couple feet tall, and can reach onto tables, and see all the other kids grabbing cookies, it happened.  He grabbed a big ol' chocolate chip cookie and took a bite. 

It was at a Halloween party, he was dressed up in his fireman's outfit, and just like all the other children he was having a great time.  Mingling parents above, playing kids below, and lots of fun.   Of course he's going to grab a cookie!

Luckily, my husband saw him take the bite and was able to get it from him, deftly swapping it for one of the allergen-free ones we'd brought.  But the deed was done. 

Thank goodness, his food allergies have not (to date) been anaphalaxis-inducing.  That reaction, apparently, is reserved for dog saliva.   But when he has been exposed to food allergens in the past, we see eczema, rash, and spots on his face in around an hour or less, plus lots and lots of scratching.  Later we'll see spots on his lower back and legs, depending on the allergen.  We started to see several of these by the time we got home. 

Unfortunately, this appeared to be a store-bought cookie ~ which means it's likely to have included most of his list:  wheat flour, butter, milk, soybean oil, shortening, and soy lecithin.  Probably not nuts.  It would have been a great test case if it had only been a single known allergen... but, nope.  It was a list. 

On the flip side, it was only one bite.  And his reaction, while clear to me, wasn't horrific.  He didn't seem itchy later, just a few little spots on his face and lower back.  Quite a relief to a mom who was having a quiet meltdown!  In fact, the mild reaction gave me hope ~ is it possible he's outgrowing some of his allergies? 

We just had some bloodwork done that was by its very nature vague.  Yet it did come back absolutely clear on dogs and cats:  allergic in a big way.  Not that this surprised me, as the one ER visit we've made was after a cute puppy licked his face while we were out on a hike.  (booooo!... no kitten or puppy some day?  That stinks!)  But under 2 years old, there is very little clarity in any blood test result ~ and skin testing is just not effective at this age either. 

So we wait.  Yes, crisis averted ~ but it made me really pause.  I can control every aspect of what happens ~ at home.  We can make food that's yummy, tastes and looks like the "real thing", is healthy and nutritious and allergen free.  Again, at home.  We can send snacks with him.  We can bring our own contributions to potlucks.  But, there's a whole wide world out there. 

How are we going to stop a rambunctious, fun loving two-year old from grabbing a cookie without squelching the joy out of every event by keeping him away from any dangers?   And when he gets to pre-school and later kindergarden, how will we be able to trust others to ensure he's being protected? 

Please, if anyone's out there who has faced this, can you give me some good ideas? 

Friday, October 28, 2011

Not-so-Scary Halloween Ghost cookies - allergen free :)


So we're gearing up for cookie making season, and finally, what better opportunity to test out recipes than Halloween? 

Jessica found a great recipe for Sugar Cookies on the Bob's Red Mill site.  We had to adapt a little for some allergens in the recipe (butter became palm shortening, for example... a perfect example of how it's easy to subsitute once you have some viable alternative ingredients!), plus we didn't have honey or lemon peel handy, but overall we used this recipe as it stood.

But this is a great point... substitution when working around allergens can free you up to explore so many options, where once you found limitations. 

For example, palm shortening has been a baking godsend.  It swaps out equally for butter or Crisco in recipes.  Once I discovered its existence last year before Christmas, I was thrilled we could make holiday cookies like crazy.  

Vegans are great at substituting non-animal-based alternatives for ingredients  ~ check out a single vegan bakery in the East Village, and you'll be hooked for life! ~ so I've been taking cues from them on many recipes.  One great option for those with egg allergies is flaxseed flour - just 1 T ground flaxseeds  to 2 - 3 teaspoons of water = 1 egg equivalent for baking.  Some recipes say boil it for a minute then cool, others just say use warm water and let it sit for a few minutes.  So, if you have an egg allergy you can still make these cookies!

We baked these cookies for around 8 minutes

Sugar Cookie Recipe

Ingredients:
•1/4 cup palm shortening (spectrum organics makes a nice one!)
•2 Tb Maple Syrup
•1/2 cup Sugar
•1-1/2 tsp GF Vanilla
•1-3/4 cups Gluten Free All Purpose Baking Flour
•3/4 tsp Xanthan Gum
•1/2 tsp Sea Salt
•1 tsp Baking Powder
•1/2 tsp Baking Soda
•1 Tb Water, if using electric mixer
•1 large egg white (or use egg substitution, above)

In stand mixer or with a hand mixer, blend palm shortening (room temperature, not melted), maple syrup, sugar and vanilla until smooth. Add flour, xanthan gum, salt, baking powder, baking soda, egg white and lemon peel, blending until mixture forms large ball. If using electric mixer, blend ingredients, then add water if needed, 1 tablespoon at a time. Shape into a ball, cover and refrigerate for about a half hour.

Preheat oven to 325°F.  Oil a large cookie sheet with allergen-free oil. Roll out dough and cut into scary shapes!

Bake 8 - 10 minutes or until edges are set. Remove from oven; cool two minutes before transferring to rack to cool.

Icing

1/4 c confection sugar mixed with
1 Tsp of water
1 T corn syrup
1 Tvanilla rice milk,

...and used Enjoy Life soy / dairy / nut / gluten free chocolate chips to make scarrrry faces! :)

Of cooking, cheese and good morning omlettes

Am I obsessed with breakfast food? Maybe.

But... there might be a good reason.  Morning is the one part of the day I tend to have wide open stretches of time with my son. Cooking together has become a time for us to just be with each other ~ laughing, making something, and exploring new ways to communicate. It's our special time.

My little sous chef, with his own pots and pans. 
Canape "baby knife", spice cabinet, and favorite spices.

He's starting to talk a lot more, and it's so exciting. And even though I know it's happening, I am always surprised when ~ out of nowhere ~ he says words and phrases I didn't realize he had even heard before. Watching his mind and imagination blossom has been one of the single most amazing things I've ever experienced. I'm sure, if you're a parent, you've had this experience... you hear the words "apple cider" pop out of the mouth that used to solely utter "ba ba ba ba" ~ and you just want to jump for joy. Or cry. Or hug him. Or all of these things. But instead, so the kid doesn't think you're a complete loon, you say "oh, yes! I see the apple cider too! Would you like some?" and nod sagely.

While cooking with Q, I'm having more and more of these moments. He is showing so much personality, and I'm getting to know more of what he likes and doesn't ~ for example, he loves basil in his eggs and cardamom in his oatmeal.  I see how much of what he gets ~ like, he knows mommy loves smoked paprika, so he hands it to me whenever he finds it in the spice drawer. (we have a spice drawer that rolls out of the bottom cabinets, only 4 inches wide but cabinet depth... it's the perfect height for a toddler to pull out and, well, re-organize!) And I get to hear his new language skills as he describes what he is doing.  "I stirring, cover, bubble bubble!" he says to me as he does all those things.

We got him his own little pot and pan set (thank you Ikea kid's section!) and he's in love.  You see him using it in the picture above: I pull up a kitchen chair with its back toward the stove, remove the stove dials he can reach, keep him faaaar enough away from the hot spots, and let him pretend to cook alongside me.  He has to have a spatula all his own, a mini "cutting" board, and a few play veggies (or real ones) so he can make his own thing.  We let him "try" ingredients to see if he wants to include them in his masterpiece ~ if he likes them, they go in the pot!  Just the other day we ended up with a piece of broccoli, a tiny bit of mushroom, a couple peas, black pepper and some tarragon.    A lovely dish!

So... back to breakfast. 

We've been making eggs for Q for a long time.  Sometimes we mix it up a bit and fry a couple chopped hot dogs in there, or bacon.  (We have found both in nitrate-free, uncured versions ~ Oscar Mayer all-beef Angus Selects for the hot dogs, and Nature's Promise uncured bacon (from Stop & Shop)... plus other deli meats that are uncured and gluten free, like Hormel Natural Choice oven roasted turkey, shown below)   We can add variety by frying up a little of one of those first, then adding eggs and scrambling them.  Delicious!

Working on communication, I asked Q the other day what we needed to make "eggies" as he calls them.  During the conversation, we drew the items either he or I came up with, and it became kind of a visual recipe.

We needed: a pan, eggs, a spatula, oil, and of course basil. 

And while that's been fun for a while, I began to wonder how to mix it up.  At the same time, I heard about rice-milk based cheese!  Oh cheese, the holy grail of missing foods for me when I was nursing!  I missed it, craved it ~ but non-dairy versions I found either were soy-based or even had casein in them.  It was so frustrating!  


Just recently, however, I heard about rice-milk based cheese ~ it was hard to hunt down, but I found one at our local natural foods market that was soy, dairy, gluten and nut free ~ Daiya Dairy Free.  (For those in the New Haven area:  Edge of the Woods)  There were other dizzying options for those who don't have the same limitations:  almond milk cheese looked interesting, lots of soy, but... well, if you're reading this blog you're likely already a label-reading person.  There's a lot of hidden casein and soy in many.  

Even so, it was so exciting to stand at the cheese section and imagine the possibilities for my little guy... grilled cheese sandwiches, nachos, pizza!  Many of the foods that the grand poobah in the sky created specifically to delight children. 

I picked up two varieties: cheddar and mozzarella styles.  As soon as I was home, I had to try them!  Right out of the package, they seemed a little ... eh.  A bit salty, not so much creamy.  But, apply heat e voila!  Melty, gooey, and pretty darned good for something that isn't the real thing.  Yay!

So again, back to breakfast: 

Combining my recent discovery of the rice-milk based cheese and my desire to branch out in the eggs department, it was a natural progression to omlettes.  Simple, easy, fast, and way better than just scrambled.  Here's what we used:

Turkey-Broccoli-Cheese Omlettes

Olive oil
1/4 medium onion, diced fine
1 broccoli "tree" chopped fine
1 slice deli turkey, diced small  ~ or hot dogs, leftover chicken, etc.
2 Eggs
1/4 cup cheddar-style rice milk cheese
ground black pepper, just a shake 
basil or Italian spices, to taste

In a little oil, saute onion and broccoli together until the onion is translucent and the broccoli is bright green, just a minute or two.  Add the broccoli and saute a couple minutes. 

Meanwhile crack the eggs into a little bowl and scramble them.  Add to the pan in as close to a circle as you can manage.  Lower the heat to medium low, and cover for a couple minutes until the egg is starting to set. 

Add the cheese and spices and cover again until the egg is set and the cheese looks melty. 
Fold over the omlette, but if that doesn't work, just serve this as scrambled eggs and no one will know the difference!

Get the plate on the table to cool off while you wrangle your small child into the high chair, booster seat or if necessary, your lap.  This should be the precise time needed to cool off the omlette to the perfect temperature! 

This was such a win with Q! ... he gobbled it up, practicing "cutting" skills with his little plastic fork, but eventually just started grabbing chunks of egg and turkey omlette.  Dipping daintily into ketchup first, then unceremoniously shoving the food into his mouth, he loved it.  And I felt so close to him, as I did just about the same.

Posted by Picasa